October 22, 2015
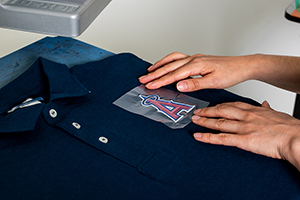
Performance T-shirts, compression apparel and other garments that include stretchy or synthetic fibers can be difficult to screen print and properly cure. However, the popularity of these expensive fabrics has made vinyl decoration with a heat press the go-to choice for many decorators.
With heat-press vinyl, there is an added control factor that allows for temperature-sensitive garments to still be pressed as long as the proper guidelines are followed. These factors, combined with the added cost of many high-end brands, clearly demonstrate why a heat-press decoration option should be considered as an alternative to screen printing, as it can help avoid scrap garments.
In addition to being safer, heat-press vinyl also is an advantageous process for variable data orders like names, numbers and other artwork that may be different on each shirt.
There is an enormous selection of possibilities in heat-press products that can be used on garments. Here, I will focus on cut vinyl due to its reliability and consistent nature when being applied to heat-sensitive fabrics.
To make the most of heat-press vinyl and reap the best profits from the process, it is important to first sell the process correctly so the customer understands how the final product will look. Then you can be creative with picking the correct process for the style of artwork requested and set up the job to work best with your equipment to save headaches, streamline your production, and make considerably more money in both time and material savings.
SELLING THE SOLUTION
The first step in providing a quality decorated product is to define the customer’s needs, then sell the best solution that will work on the chosen product. For example, even one scrap of an expensive Nike jacket (at $80 wholesale) could put the printer in a hole for an entire order of a smaller quantity. A disclaimer regarding expensive supplied garments should be discussed with the client. This will cover you in case you experience unexpected results.
The majority of production issues with heat-press vinyl are solved by having a quality heat press that has consistent heat and adjustable pressure. To properly apply an image, the correct heat and pressure settings need to be dialed in so the fabric surface isn’t damaged and the vinyl is permanently adhered. Depending on the fabric in question, your garment supplier should have suggestions on the best temperature and pressure settings to use. There are many different vinyl styles that can accommodate fabric needs, including mesh, so be sure to ask your vinyl supplier which styles will be common requests.
The main issue with artwork and the heat press is design complexity related to different edges and shapes that need to be cut out. If a customer is requesting a cut vinyl solution for a yoga design, for example, he needs to know immediately if it must be dramatically simplified or changed for production (see Figure 1). A design with a lot of small lines or closed shapes with cutouts will not be ideal for heat pressing. Discussing this during the sales process will eliminate a lot of client stress and avoid a possible production nightmare.
A before-and-after guide can help you demonstrate a few edits for clients that show how designs can be made cut-vinyl friendly. This also will make these jobs far more profitable (see Figure 2).
PROPER SETUP
Whenever possible, avoid weeding or at least minimize the amount that is needed. Time estimation for this process is a numbers game, so be cautious of underestimating projects and always try to understand your customers’ potential demands, as well as their current orders. You don’t want to sell four shirts and end up with a repeat order for 75 if the design takes a long time to weed.
In this case, you occasionally can sell customers on a screen-printed design. But the cut vinyl can be a difficult match for a high-volume screen-printed order or may not work on a heat-sensitive item that can’t go through the dryer.
A great way to set up artwork for the heat press is to subtly alter it to help avoid weeding. Some of the ways to do this include: making the logo into a stencil-style font; adjusting the line widths in a design; simplifying the complexity of an image; and changing a graphic into a symbol instead of a detailed image.
To convert a block font into a stencil using CorelDRAW, you just have to study how this font style is created and then apply overlapping rectangles to the right areas. Once the cutouts are approved, the final design can be trimmed so that the cutter will follow the remaining font areas, but leave the insides of each attached so they can be pulled out as one big piece in a single step (see Figure 3).
This same process can be used effectively in script fonts and logos as long as the resulting images have cut-outs that don’t dramatically and adversely affect the legibility or visual appeal of the original.
Adjusting a design’s line widths is helpful for avoiding issues with thin pieces of vinyl that may become distorted, break off of the garment easily or not stay attached to the release sheet long enough to be heat pressed. The main thing to remember is that the production file cannot use the outline style commands for line widths without converting it to a visual object size.
This means a thicker line needs to read in the software as a thicker outside cut line around the image, and not just a thicker line in the software for display. In software such as CorelDRAW, the “Convert Outlines to Objects” command is useful for defining the actual line that the cutter will follow.
Simplifying a complex image often involves the same process, followed by creating a posterized effect of the graphic. This means converting all of the shadow areas in the design to solid shapes while all of the highlight areas stay open. A popular conversion of this commonly is used in sport ball templates for T-shirt graphics. These are used as symbols to represent the sports and are wildly popular as accents to logos and team graphics. They also happen to be great heat-press vinyl design solutions due to minimal or no weeding necessary and simple edge qualities (see Figure 4).
PROFITS THROUGH SAVINGS
Some of the cutter software will allow you to pack designs together so that you can cut them in rows to use the most possible vinyl surface. This way, you don’t waste big vinyl pieces from small jobs that don’t use the negative space around them well.
Once you begin to do more vinyl, you will become more creative in your ability to stagger different designs to save as much waste as possible on each one. The goal, however, is to keep an objective and production-oriented mindset during this process. If you get too creative with meshing designs together on vinyl sheets, you can inadvertently make yourself an exacto puzzle that takes more time to cut apart than it saves in production.
A good rule to follow is to allow for straight cut lines between designs and jobs so you rapidly can separate them using a large cutter. If you try to use all the negative space inside letters or save a lot of vinyl scraps, you can make it a challenge to quickly cut the designs apart. The headaches may not be worth the money saved (see Figure 5). Without an honest, objective perspective, this idea of using every piece of vinyl can lead to small shops spending hours to save only a handful of dollars in vinyl.
There are some cases where this can make sense if the design isn’t too complicated. When you have an asymmetrical design, you can sometimes get more designs in a smaller amount of space. Just be prepared to spend more time extracting them.
Once you have practiced with selling, designing and preparing cut heat-press vinyl, it can become an ideal solution for your customers. A process that is both safe for expensive items and perfect for variable data or short runs, the correct art and production will make a heat press a profitable option for your shop.
Thomas Trimingham has been working in screen printing for more than 23 years as an industry consultant, freelance artist, and high-end separator. He is an award-winning illustrator, designer, and author of more than 125 articles on screen-printing art and separations. For more information or to comment on this article, contact Thomas through his educational website, screenprintingartist.com.
Suggested Reading:
Like this article? Read these and other digital decorating articles at impressionsmag.com.
January 26, 2024 | Process + Techniques
So, your customer returned again this year asking you to reprint their usual spirit-wear design for the upcoming football game. That’s great. But why stop there? Think of all the potential that exists for increasing your sales by taking that one design and using it to create an entire collection.
FULL STORY
October 16, 2023 | Process + Techniques
Once you have chosen the type of emblem you want to use, you must decide which application method will be best.
FULL STORY
August 2, 2023 | Process + Techniques
Many apparel decorators have decided to diversify their businesses, and with newer technologies being simpler to adopt, there are now more shops with more decorating choices available than ever.
FULL STORY