March 13, 2015
Screen printing halftones on textiles is not as daunting of a process as some people make it out to be. However, there are steps that must be followed to ensure success. Most garment decorators are good at making screens for spot-color jobs because the exposure latitude is wide and screen making seems pretty easy — until you try to expose that first halftone job. The following tips will make screen making and printing halftones a little easier.
In the early years, process cameras were used to convert a photo into a series of dots to reproduce the shaded tones in the image. Today, this process is much easier by using special raster image processor (RIP) software, which converts images from vector form into a rasterized dot pattern.
SCREEN MAKING CONSIDERATIONS
Screen Making with Film Positives: To create film positives for halftone printing, the rasterized image is sent from the computer to a laser or inkjet printer and printed onto clear transparency films. A common formula used to determine the correct screen mesh count is to multiply the dot line count by 4. For example: A 55-line dot multiplied by 4 results in a 220 mesh. In this case, round up to a 230-mesh since it’s a common mesh count in this range.
CTS Inkjet Printers: With computer-to-screen (CTS) equipment, you can bypass the film-making stage altogether and print the rasterized image directly from the computer to the contact side of the emulsion-coated screen. Not only does this process eliminate creating expensive films, but it also eliminates the need to store them. The main ink types used with today’s CTS systems include wax, water-based inkjet toner and specially formulated UV-blocking formulations.
Wax: The heated wax inkjet technology is a popular method for printing a high-density image directly onto an emulsion-coated screen. Some CTS systems that image with wax can reportedly print 1,200 dpi, allowing halftone frequencies of up to 110 lines per inch (lpi).
Water-Based Inkjet: Some CTS systems use Epson piezo inkjet heads with proprietary inks that have special UV blockers added to increase performance during the screen exposure stage. Inkjet system manufacturers report that their CTS systems can print 720 dpi, run on standard PC software and use a standard USB-2 port connection.
SCREEN EXPOSING AND COATING
Every screen-printing shop needs an exposure calculator when attempting halftone printing. Basically a test film positive composed of fine detail, it helps to determine the optimal exposure time for the emulsion, mesh and stencil materials being used. There are two main kinds of exposure calculators: the step wedge and filter type.
It’s important to periodically repeat the exposure calculator test because exposure times will increase as the light source gets weaker. The most accurate way to compensate for weak bulbs and power fluctuations is to invest in an exposure unit with a light integrator. This device uses an optic photocell to collect and measure how many units of light are delivered to the screen surface during exposure. This greatly helps to control exposure times.
Halftone printing can get pretty technical. Before the advent of YouTube, where screen printers can watch videos to answer technical questions, industry veterans and experts like Richard Greaves and Mark Coudray were printing halftones, and here they share their decades worth of knowledge.
“When it comes to stencil considerations for exposing halftones, there are dual-cure stencils that use both diazo and photopolymer sensitizers,” Greaves says. “They can be formulated with high solids content, which means better resolution, exposure latitude and coating properties than conventional pure photopolymer or diazo stencils.
But they do take longer to expose. Dual-cure direct emulsions are typically 50%-60% water, and the solids that are left behind when you dry a stencil shrink and take on the texture of the mesh that rarely leaves an even film on the bottom of the mesh to control your image.”
Greaves adds that direct films are superior because they have a solids content near 90%, meaning they’re not liquid. “You stick them to wet mesh like a postage stamp,” he explains. “This also means stencil preparation is much faster because you remove the drying step after degreasing and only application water needs to evaporate, compared to the 50%-60% water in direct emulsion. Direct films also deliver stencil consistency — even from inexperienced screen makers — unlike direct liquid emulsions.”
Greaves says a strong vacuum on your exposure unit and the use of dyed mesh can help reduce the choking effect by absorbing scattered UV energy and pressing the positive tightly against the stencil.
“The untrained screen maker, who has been told the stencil has been overexposed, will react by reducing exposure — which means the stencil will be ‘medium rare,’ not ‘well done,’” he adds. “For a plastisol ink print, this usually isn’t a problem because plastisol never hurts a stencil. But water-based or solvent inks and stencil removers will attack the uncured stencil on the inside where the ink and squeegee will be pressed down hard and rubbed like an eraser. The only way to compensate for undercutting is to make dots larger on the positive, so that you get the size you want on the final print and have a completely cured, durable stencil. This is like sighting on a rifle for accuracy.”
SCREEN PRINTING HALFTONES
For screen printing halftones, I prefer to use an elliptical dot in the 45-line count range exposed on 230 yellow mesh tensioned at 20-25 N/cm. Also, I print with a dual- or triple-durometer, straight-edge squeegee. I keep off-contact distance minimal to allow the screen mesh to snap off right behind the squeegee during the print stroke. Too much off contact will cause excessive ink on the substrate and the dots will expand in size. I use Great Dane Graphics software and typically select a 45-line halftone at 61-degree angles using an elliptical dot shape. (My film positives are made using AccuRip software and an Epson 4900 inkjet printer.)
Coudray says: “For the cleanest dots and best tone range, use a sharp 70/90/70 triple-durometer squeegee and 305.34 mesh tensioned to at least 25 N/cm. One of the easiest tricks you can do to really improve your halftone printing is to add 2% by weight of clear, high-density base to your halftone inks. This will dramatically reduce your dot gain and improve the tone transition from lights to darks.”
Trying to print halftones with the same squeegees that are used in the shop on a daily basis also can be a mistake. “One of the most common errors I see printers make is to use a squeegee that is too dull,” Coudray says. “For sharp dots, you need to cut the ink, not mash it. To determine if your squeegee is sharp enough, lightly drag your finger across the edge of the blade. If you can feel the individual ridges of your fingerprint, the blade is sharp enough.”
High-tension screens are best for printing halftones because they enable better registration, controlled off-contact and excellent “snap-off” behind the squeegee.
Stir plastisol inks thoroughly before going to the press and, according to Coudray, never add reducer to ink that will be used for printing halftones. Reducer destroys its thixotropic nature, causing massive dot gain and a dark, muddy print. If you can’t see the individual dots when all the colors are printed, that means you’re mashing the ink, he says.
“It’s common for beginning halftone printers to use 230-mesh for their prints, and a low line count such as 45 lpi. The line count is OK, but you need to use 305 plain-weave mesh with 34-micron thread (305.34 plain weave). It will print as easily as 230, but with much more control. Keep the tension at 25 N/cm or higher for best results.”
James Ortolani has more than 30 years experience in the decorated apparel industry, specializing in hands-on direct screen printing and heat transfer production. He has worked for main industry suppliers, and currently serves as product development specialist for Transfer Express. For more information or to comment on this article, email James at james.ortolani@stahlsdfc.com. — J.B.
April 5, 2024 | Process + Techniques
Why do we often struggle with some of the seemingly simplest things, like slathering screen-printing ink onto a decorated-apparel garment. Slathering so that it looks clean, bright, opaque and altogether attractive.
FULL STORY
March 13, 2024 | Process + Techniques
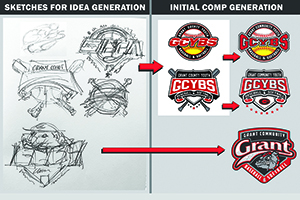
Wouldn’t it be wonderful if there was a secret formula for designing a best-selling T-shirt for a sports team, a business or for your own pre-print line?
FULL STORY
January 25, 2024 | Process + Techniques
As is the case with any craft, when it comes to screen-printing T-shirts and other apparel the devil is in the details. The best art, the best press in the world will inevitably come up short if you don’t take care of the little things as well.
FULL STORY