December 23, 2014
(Editor’s Note: The design that is printed in this article is featured on the cover of the August issue of Impressions. Special thanks to SPSI for mixing the PMS plastisol colors; Great Dane Graphics for providing art; NazDar for providing emulsion; Delta Apparel for providing hoodies; and New World Graphix for the use of its facilities.)
Please see attached Photo Gallery for Figures A-D
After a hot summer of T-shirt printing comes the beginning of a new opportunity for screen printed fleece. Are you up for the challenge?
Let me take you through the step-by-step process of printing on this substrate.
Step 1: Art Selection
The first step was to select the artwork, so I browsed the Great Dane Graphics website to choose a design I liked: a sea turtle. I then spoke with site owner Dane Clement to review the details of the job and to explain that I had access to a six-color manual press. This meant I had to limit the number of screens I would use.
Next, Clement used Separation Studio software and we selected a 45-line halftone (I like big dots) at 61-degree angles using an elliptical dot shape. The film positives were printed using AccuRip software and an Epson 4900 inkjet printer.
Step 2: Screen Selection
High-tension screens are the best choice for printing simulated process art due to several factors, including better registration, controlled off contact and excellent “snap off” behind the squeegee. Retensionable frames are my first choice for printing simulated process prints but, due to a time crunch, I used six 20″ x 24″ outside diameter (OD) static aluminum frames with yellow mesh tensioned to 20 N/cn.
We used a 156-mesh for the white underbase and 230-mesh for the colors. Notice the amount of detail in the white underbase print (Figure A). With artwork this detailed, it’s possible to use the white underbase print as a one-color graphic or add a second color to achieve a cool dual-tone effect.
Step 3: Screen Making
Next, Chris Blancho of New World Graphix (NWG) and I made the screens for the design at his shop in Pittsburg, Kan. NWG primarily is a flock transfer printing shop, so the finest screen mesh available was 60. We knew this was not going to hold the fine dots in this design, so we used a simple mathematical formula to determine which screen mesh to use. We simply multiplied the dot line count by 4.5 to come up with the mesh count needed. Here’s an example: the 45-line halftone, multiplied by 4.5 equals 202.5. Rounding up to the next available mesh count gives us a 230-mesh.
It’s important to note that yellow mesh reduces the light scatter and is critical to use when exposing half tones. In addition, we had to acquire a different photo emulsion to coat the screens since NWG uses a high-solids, water-resistant emulsion made for coating coarse mesh. Nazdar provided a sample of Ulano’s new Orange screen emulsion that worked great for exposing even the smallest dots in the 5% tone areas of the design.
After degreasing and drying the new screens, I used a one-on-one screen coating technique, which means I applied one coat of emulsion on the contact side of the screen and one coat on the squeegee side using a sharp scoop coater. Note that there are two different edge profiles on opposing sides of most scoop coaters; one side is dull for coating coarse mesh and the other side is sharp for coating finer meshes.
We used a 1,200-watt metal-halide exposure unit to expose the screens and we had to reduce the unit’s preset time from four minutes (for exposing 60-mesh screens) to 1.5 minutes. By doing so, we nailed our exposure on the first screen.
We knew we had the correct exposure time by inspecting the grey scale bar at the top of each positive to see that all the dots in the 5% tonal range, up to 100%, were washed out properly (Figure B). This is an excellent way to ensure the full tonal range of halftones in the design were washed out and open.
Step 4: Color Order
Prior to setting up a simulated process design, it’s critical to inspect the press to ensure all shirt boards are level and the micros are “zeroed out,” or centered, prior to registering the job. If the shirt boards are not totally level, the halftone detail in some areas of the design will be lost due to the screen not making sufficient contact with the substrate. Since fleece is a thicker substrate than T-shirt material, it’s critical to slightly raise the screen off-contact adjustment to account for this difference.
Great Dane Graphics prints the color order directly on the films, so I didn’t have to think extensively about color order. It’s detailed in the next step of the process.
Step 5: The Printing Process
The white underbase was printed first with a 156-mesh and flashed for six seconds (Figure C). Next, the black ink was printed. Printing this color on a navy garment may seem redundant, but it is necessary to give the image depth. Also, it is especially needed if you decide to print this design on a variety of different-colored garments.
Red PMS 199 was the third color printed (Figure D) and, although there’s not a lot of red in the design, it adds a realistic quality. Blue PMS 299 was printed fourth, giving the design the full effect of being under water. Gold PMS 103 was the fifth color printed, giving the illusion of the sun shining through the water on the turtle shell. Highlight white was printed last to make the design pop off the shirt.
FLEECE PRINTING TIPS
Printing on fleece is not that much different than printing on T-shirts, but there are several pointers that will make the task a little easier.
1. Cover the shirt boards with pallet mask. This material looks like a giant roll of masking tape and each shirt board needs to be covered to allow for easy cleanup after printing on fleece. The lint from inside the fleece garment will build up quickly on the shirt board due to the spray adhesive used to hold the garment in place. After the job is finished, you can pull off the mask, along with a thick layer of lint material, for quick cleanup.
2. Use pallet adhesive. Though I recommend the web-type spray adhesive for best results, there also is a “roll-on” water-based pallet adhesive that is gaining popularity with printers wishing to achieve a tacky surface for fleece. It also eliminates the worry of spray adhesive getting airborne and sticking to everything in the shop.
3. Curable reducer can help. For this print, I reduced the inks with a curable reducer (3% by volume) to allow the inks to better flow through the 230-mesh and to reduce the need for multiple squeegee strokes on the fleece surface. In addition, I stirred the inks longer than normal to allow better flow. Plastisol inks are thixotropic in nature and have a “false body,” making it important to stir well before printing. They also are pseudo-plastic in nature, and will start to thin out due to friction from the stirring action and warmer ambient temperatures.
4. Watch the sleeves. When printing fleece, be aware of the long sleeves that hang down while the garment is loaded on your manual or automatic press. Too many times, T-shirt printers leave buckets of opened ink under the press and the long sleeves will drag through. It sounds like common sense, but it’s an easy detail to overlook since most shops normally are used to printing short-sleeve T-shirts.
5. Don’t be so flashy. Avoid long flash times while printing fleece to conserve the amount of spray adhesive that is needed to hold the garment in place and to avoid ink washout of the top printed colors. When plastisol is flashed too long, it becomes a solid film of vinyl, and plastisol won’t stick to vinyl.
6. Keep dryer times in mind. Check the temperature and belt-speed settings on your conveyor dryer. Remember that the heavier fleece material will retain more moisture and may need a longer retention time in the oven chamber to properly cure the ink. Gas dryers work best for curing ink on fleece due to the hot convection air that drives the moisture out of the fabric and speeds up the rate of heat transfer into the ink.
Also remember to pay close attention to dryer maintenance when printing large fleece runs. For example, if you clean the filters on your gas dryer every two weeks during T-shirt printing season, then you will need to clean the filters weekly when printing long fleece runs. Also, periodically check for lint buildup inside the ductwork that vents out of the dryer, as it can be a fire hazard.
7. Keep an eye out for lint on screens. When printing fleece on an automatic press, airborne lint gets on the backside of the screens and can cause downtime from having to pick lint balls out of the image area. One remedy is to make a lint pickup screen by coating and exposing a screen (with no image on it) and then applying spray adhesive to its backside. As the garment moves into position under this screen, it makes contact with the garment surface and the squeegee strokes across the top side of the screen, picking up the lint on the backside.
Note that it’s important to load ink into the lint screen (even though it won’t be used for printing) to lubricate the squeegee and allow it to move freely. Making a lint screen is only necessary if there is an abundance of loose lint that continues to cause downtime.
By following some of the pointers above, you’ll be able to offer your customers printed fleece this season. And while you are at it, step out of your comfort zone and print a simulated process job on fleece following the steps provided here.
James Ortolani has more than 30 years experience in the decorated apparel industry, specializing in hands-on direct screen printing and heat transfer production. He has worked for main industry suppliers, and currently serves as product development specialist for Transfer Express, Mentor, Ohio. For more information or to comment on this article, email James at james.ortolani@stahlsdfc.com.
Suggested Reading
Like this article? Read these other screen printing articles at impressionsmag.com:
• “Redefining Fleece”
• “The Lighter Side of Fleece”
• “5 Tips for Printing on Fleece”
April 5, 2024 | Process + Techniques
Why do we often struggle with some of the seemingly simplest things, like slathering screen-printing ink onto a decorated-apparel garment. Slathering so that it looks clean, bright, opaque and altogether attractive.
FULL STORY
March 13, 2024 | Process + Techniques
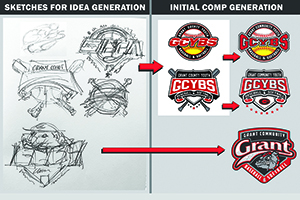
Wouldn’t it be wonderful if there was a secret formula for designing a best-selling T-shirt for a sports team, a business or for your own pre-print line?
FULL STORY
January 25, 2024 | Process + Techniques
As is the case with any craft, when it comes to screen-printing T-shirts and other apparel the devil is in the details. The best art, the best press in the world will inevitably come up short if you don’t take care of the little things as well.
FULL STORY